I’ve discovered that rucking—walking with a weighted backpack—actually targets multiple muscle groups simultaneously, hitting your shoulders, traps, core, and legs without needing gym equipment. Start with 10% of your body weight, so if you’re 150 pounds, begin with 15 pounds. The beauty is it’s low-impact yet builds serious strength while you’re outdoors. Proper form matters though—keep shoulders back and core engaged. There’s actually more to optimizing this approach than meets the eye.
Muscle Groups Targeted by Heavy Backpack Carrying
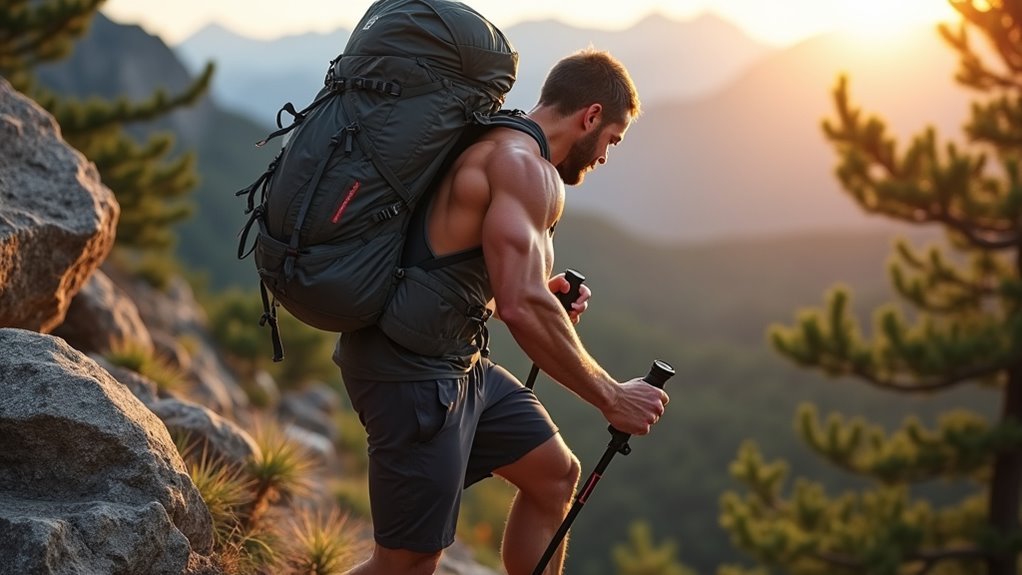
When you strap on a heavy backpack, you’re fundamentally turning your body into a walking strength training machine. I think it’s actually pretty amazing how many muscle groups get hit simultaneously. Your shoulders and traps take the brunt of the load, while your lower and middle back work overtime to keep you upright. Don’t forget your core—it’s constantly engaging to maintain balance. Well, your legs aren’t just along for the ride either. They’re powering through with every step, building strength naturally. It’s like getting a full-body workout without stepping foot in a gym. Additionally, heavy backpacks can improve your weight distribution and enhance your overall balance and stability during movement.
Understanding Rucking as a Fitness Method
Although rucking might sound like some military jargon you’d hear in a war movie, it’s actually one of the most straightforward fitness methods out there. I think it’s brilliant—you’re literally just walking with weight on your back. No gym membership required, no complicated equipment.
Rucking strips fitness down to its essence—just you, a weighted pack, and the simple act of putting one foot in front of the other.
Picture yourself:
- Strapping on a loaded backpack at sunrise, feeling the weight settle across your shoulders
- Hitting the trail with purpose, each step building strength in your legs and core
- Breathing deeply as you conquer hills, knowing you’re torching calories while building muscle
It’s freedom disguised as exercise.
Determining Your Starting Weight
One essential mistake I see people make—and honestly, I made it myself when I first started—is jumping straight into rucking with way too much weight. Look, I get it. You want results fast, and heavier seems better, right? Wrong.
Start with just 10% of your body weight. If you’re 150 pounds, that’s only 15 pounds. Sounds wimpy? Trust me, after a few miles, you’ll feel it. Your body needs time to adapt.
I’d increase by maybe 5 pounds weekly—no more. This isn’t about proving anything. It’s about building strength without destroying yourself.
Progressive Weight Increase Strategies
After you’ve built that foundation with 10% of your body weight, the real art lies in knowing when and how much to increase. I think the key is listening to your body—it’ll tell you when you’re ready for more challenge.
The real art lies in knowing when your body is ready for the next challenge.
Here’s my approach to progressive loading:
- Add 5 pounds weekly once your current weight feels comfortable for three consecutive sessions
- Take deload weeks every fourth week, dropping back 10-15 pounds to let your body recover
- Monitor your form constantly—if you’re compensating or hunching forward, you’ve probably gone too heavy too fast
Freedom means respecting your limits while pushing boundaries.
Essential Safety Guidelines and Injury Prevention
Since we’re fundamentally turning our bodies into pack mules, we need to think about safety the same way a smart mule would—well, if mules could think strategically about injury prevention.
| Safety Priority | Key Action |
|---|---|
| Proper Fit | Adjust straps for weight distribution |
| Posture | Keep shoulders back, core engaged |
| Break Frequency | Rest every 30-45 minutes |
| Body Signals | Stop if you feel sharp pain |
I can’t stress this enough—your body’s feedback is everything. Don’t push through actual pain; that’s probably your tissues saying “hey, we’re not ready for this yet.” Listen to those signals before they turn into something worse. Additionally, ensuring the total weight of the backpack is between 10-20% of body weight is crucial for preventing strain and injury.
Proper Backpack Fit and Posture Techniques
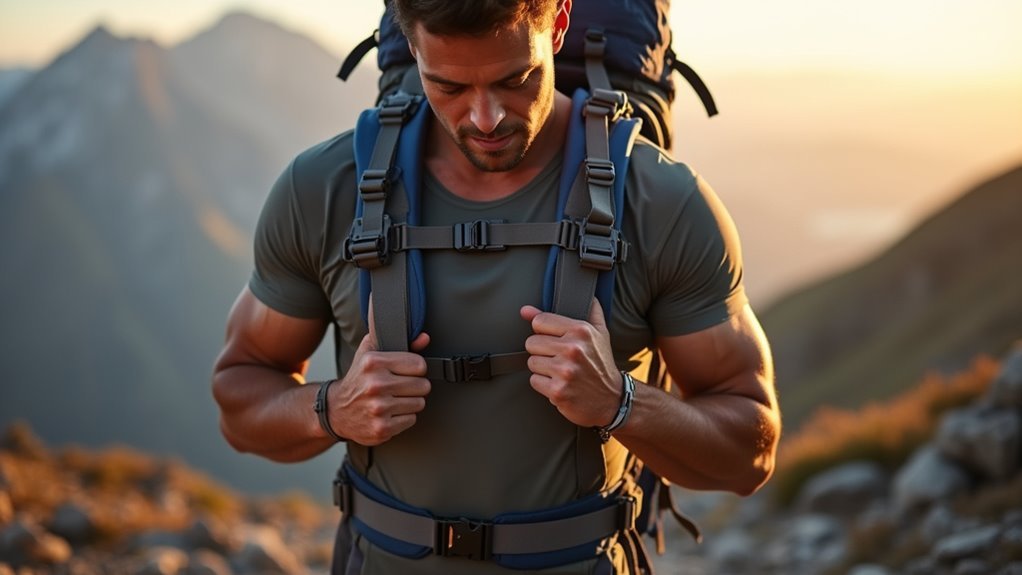
Getting your backpack to fit properly isn’t just about cinching some straps and calling it good—it’s actually more like tailoring a piece of equipment to your specific body. I’ve learned that when you’re carrying serious weight, every adjustment matters for maintaining your freedom of movement.
Here’s what I focus on for proper fit:
- Hip belt positioning: The belt should sit snugly on your hip bones, not your waist.
- Shoulder strap tension: Adjust so they’re supportive but don’t dig into your shoulders.
- Load lifter angles: These should pull at roughly 45 degrees from your shoulders.
Proper posture means keeping your core engaged and avoiding that forward lean. Additionally, proper weight distribution is crucial for minimizing strain on your back and enhancing overall comfort during your journey.
Integrating Heavy Backpack Training Into Your Routine
When I first started incorporating heavy backpack training into my weekly routine, I’ll admit I was probably a bit too enthusiastic and tried to do everything at once—which, looking back, wasn’t the smartest approach.
Here’s what I’ve found works best for gradually building this into your schedule:
| Week | Training Days | Weight |
|---|---|---|
| 1-2 | 2 days | 10% bodyweight |
| 3-4 | 3 days | 15% bodyweight |
| 5-6 | 3-4 days | 20% bodyweight |
| 7+ | 4+ days | 25% bodyweight |
Start small, maybe just weekend hikes. Your freedom to explore new trails while building muscle simultaneously? That’s the real win. Additionally, it’s important to consider weight limits to avoid injury while engaging in this form of training.
Benefits of Low-Impact Muscle Building
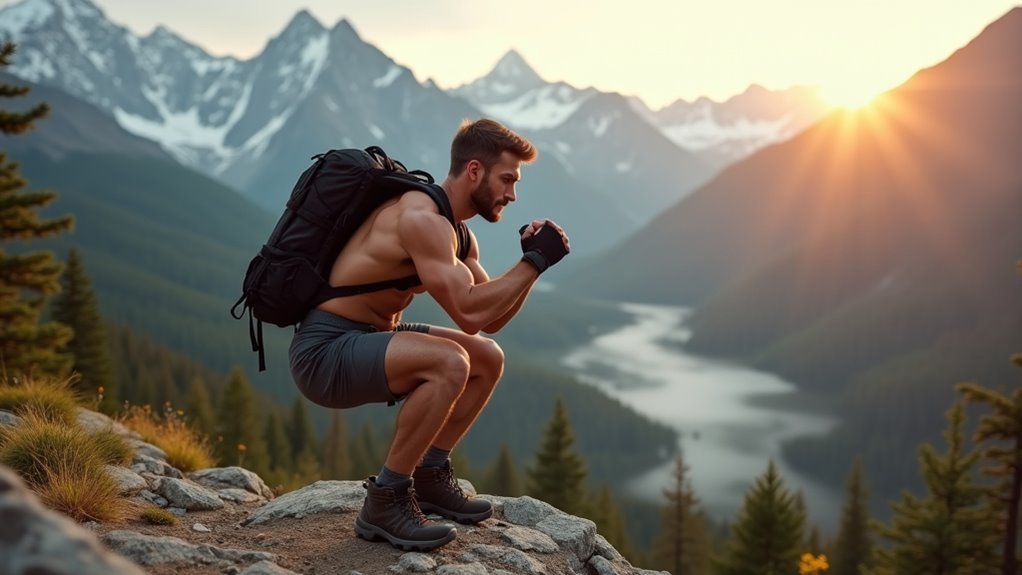
What I’ve come to appreciate most about heavy backpack training is how it builds muscle without beating up your joints the way traditional weightlifting can. It’s like giving your body a steady challenge instead of shocking it.
Heavy backpack training gives your body a steady challenge instead of the joint-beating shock that comes with traditional weightlifting.
Here’s what makes this approach so freeing:
- No gym membership chains – You’re building strength on mountain trails, city streets, wherever you choose to roam
- Your spine stays happy – The weight distributes naturally across your frame instead of compressing vertebrae
- Recovery happens faster – You’re not dealing with the muscle damage that comes from heavy iron
You’ll actually find yourself moving better, not worse. This method mirrors the importance of proper packing as it emphasizes balance and weight distribution, leading to a more efficient workout.
Frequently Asked Questions
What Type of Backpack Material Works Best for Heavy Weight Training?
I’d recommend durable canvas or heavy-duty nylon for weight training backpacks. These materials won’t tear under stress, distribute weight evenly, and give you the freedom to push your limits without worrying about gear failure during intense sessions.
How Does Rucking Compare to Traditional Weightlifting for Muscle Gains?
Think of rucking as weightlifting’s wild cousin—I’d say it builds functional strength through compound movements while you’re exploring outdoors, but traditional weightlifting offers more precise muscle targeting and progressive overload for maximum gains.
Can Heavy Backpack Training Help With Weight Loss and Fat Burning?
I can confirm that heavy backpack training burns calories effectively while you’re moving. You’ll torch fat through sustained cardio effort, plus the added weight increases your energy expenditure compared to regular walking or hiking alone.
What Terrain or Surface Is Ideal for Backpack Training Workouts?
I’d sarcastically suggest your couch, but you’re seeking liberation from mediocrity. Choose varied terrain – trails, hills, sand, grass – that challenges your balance and engages different muscles while keeping you outdoors and free.
How Long Should Each Rucking Session Last for Optimal Results?
I recommend starting with 20-30 minute rucking sessions when you’re beginning. As your endurance builds, you can gradually extend to 45-60 minutes. Listen to your body’s signals and don’t push through pain.