Hey there, fellow backpack enthusiasts! As someone who’s logged thousands of trail miles with my trusty pack, I’ve learned that personalizing your gear isn’t just about looks – it’s about making your backpack truly yours.
After slapping my first National Parks patch onto my weathered daypack years ago, I got hooked on this simple way to mark adventures and show off what matters to me. Whether you’re looking to cover up that annoying tear from that time you snagged your pack on a branch, or want to display your favorite band logos, I’m going to walk you through three solid methods to get those patches stuck on there for good.
From quick iron-on applications to old-school hand stitching, these techniques will help you transform your basic backpack into a unique piece that tells your story – one patch at a time.
Why Patches Are the Perfect Way to Customize Your Backpack
When it comes to making your backpack truly unique, patches are the perfect way to transform an ordinary bag into a personal work of art. We love how patches let’s tell our stories through the things we’re passionate about – from favorite bands and sports teams to travel memories and hobbies.
Before you iron or glue any patch onto your pack, make sure you’ve chosen spots that showcase your personality. Patches don’t just look cool; they’re also great for covering up small tears or worn areas, giving your backpack new life.
Whether you want to push your creative boundaries with cartoon characters or display badges from places you’ve visited, adding patches creates a portable canvas that reflects who you’re and what you love.
Essential Tools and Materials for Adding Patches
Getting started with patch customization requires having the right tools ready to go. We’ll need sharp fabric scissors for precise cuts, plus sewing needles and thread that match your backpack’s color. Don’t forget sewing pins to secure patches while you work!


For Bonding patches, you’ve got two main options: you can apply strong fabric glue directly onto the patch backing, or use iron-on adhesive if your patches are designed for heat application.
If you need to iron patches on, make sure you’ve got a pressing cloth and a heat-resistant surface handy. Having these basic supplies ready means you’ll be prepared whether you choose to sew or glue your awesome new patches. With the right tools, you’ll be customizing your backpack like a pro in no time!
Iron-On Patch Application Method
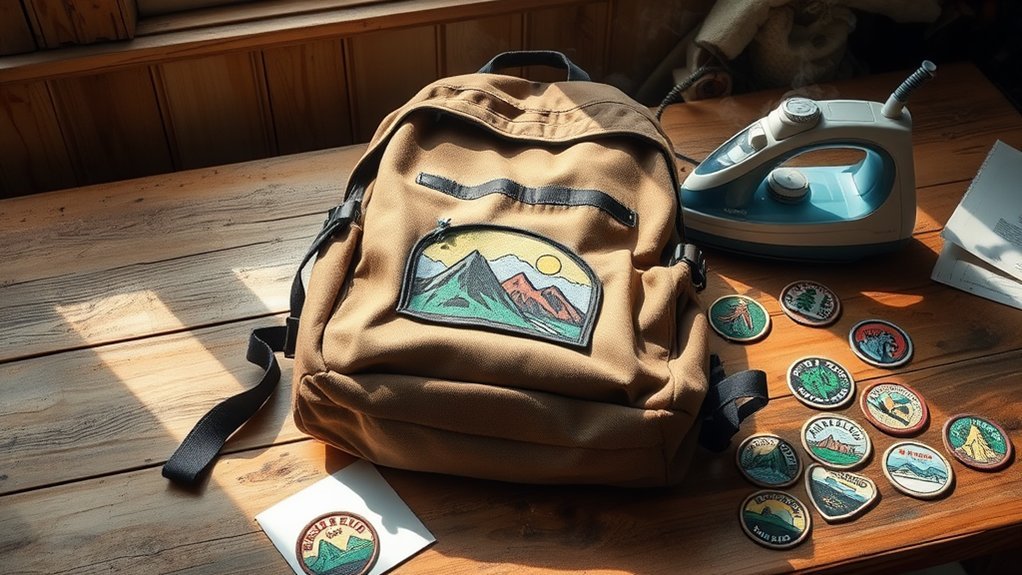
The iron-on method offers one of the quickest ways to transform your backpack with patches, though you’ll need to follow some key steps for lasting results. First, let’s make sure we’re using an iron on a clean, wrinkle-free surface of your pack.
| Step | Action | Important Note |
|---|---|---|
| 1 | Clean Surface | Guarantee fabric is dry |
| 2 | Position Patch | Place adhesive-side down |
| 3 | Add Pressing Cloth | Protects patch and fabric |
| 4 | Apply Heat | Follow patch instructions |
| 5 | Cool & Check | Allow the patch to set |
For best results, work on an ironing board and confirm the patch sits flat against the fabric. We recommend using a pressing cloth on top to protect both the patch and your backpack. This method works great on canvas and cotton packs, but you’ll want to avoid synthetic materials that might melt.
Securing Patches With Fabric Adhesive
Fabric adhesive provides another reliable option for attaching patches, especially when working with synthetic backpack materials that don’t respond well to heat. While iron on patches are super easy, fabric glue works great when we can’t use steam or heat.

- Special glue for fabrics: Permanent fabric glue creates a permanent bond that is waterproof, flexible and UV resistant f…
- Easy to Use: When use liquid stitch fabric glue, just apply fabric glue for patches evenly on the surface of the pieces,…
- Built-in Tip:Our fabric adhesive boasts a precision open needle, ensuring meticulous positioning. Additionally, the corr…

Let’s start by cleaning the area where we’ll place the patch. Apply a thin layer of adhesive around the patch edges, working in circular motions toward the center. We’ll carefully position the patch in place, then press down firmly. To guarantee it sticks well, put a heavy object on top and let it dry overnight.
This method works particularly well for patches with delicate details or when we’re adding them to waterproof materials. Just remember to check the adhesive label for compatibility with your specific backpack fabric.
Hand-Sewing Techniques for Lasting Results

When durability matters most, hand-sewing patches onto your backpack offers one of the strongest and most reliable attachment methods.
To get started, we’ll want to match our thread color to the backpack material – it’ll help make our stitches blend right in. Let’s begin with a simple running stitch around the patch’s edge. As we push it back and forth through the fabric, we’ll keep our stitches small and even, about 1/8 inch apart.
While this method might require a little more time and patience, the results are worth it. Remember to pull each stitch snug but not too tight – we want the patch to lie flat against the backpack. Working slowly and steadily guarantees your patch will stay put through countless adventures.
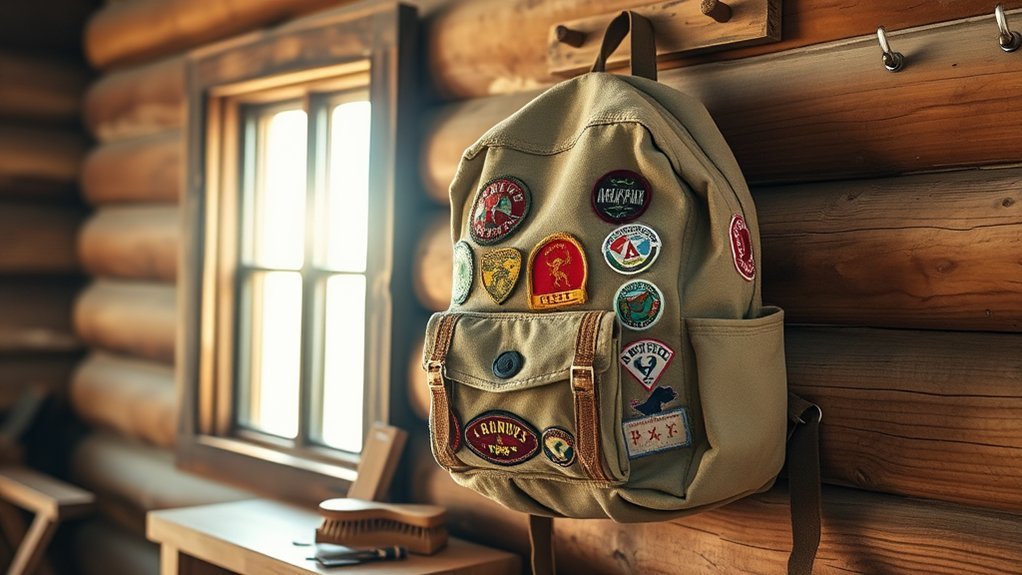
Best Practices for Patch Placement and Design
Successful patch placement starts with a thoughtful plan for your backpack’s overall design. When you’re ready to personalize your backpack, think about creating a balanced look that tells your unique story. We recommend grouping related patches together – like your favorite bands or travel destinations – to create visual themes that flow naturally.
Start with larger patches as anchor points, especially on thicker fabrics like the main compartment. Then, fill in spaces around them with smaller designs, making sure to leave enough room between each patch to apply them properly. Don’t overcrowd the top of the patch area – spacing is key! Remember, you can’t go wrong with a backpack without too much clutter. Adding patches should enhance your pack’s personality while maintaining its functionality and clean appearance.
Tips for Maintaining Your Decorated Backpack
Looking after your decorated backpack guarantees those awesome patches stay put and keep looking their best for years to come. One of the best ways to maintain your backpack that would protect patches is regular inspection and care.
| Maintenance Task | Frequency | Tips |
|---|---|---|
| Patch Check | Weekly | Look for loose edges |
| Spot Cleaning | As needed | Use damp cloth only |
| Surface Care | Monthly | Avoid heat exposure |
| Patch Rotation | Quarterly | Distribute wear evenly |
Whether your backpack is made of canvas or non-synthetic material, we recommend gentle cleaning to preserve patch adhesion. Keep your bag or backpack away from conditions that allow it to heat up or get too wet. When you notice a patch starting to lift, address it immediately – don’t wait for it to fall off completely.
Frequently Asked Questions
How Do I Add Patches to a Backpack?
We’ll show you three ways to rock patches: iron-on adhesive for quick fixes, decorative stitching with a sewing machine for durability, or velcro backing for swappable embroidered designs in different patch placements.
How to Attach a Patch Without Sewing?
We’ve got quick, no-sew options for you: iron-on adhesive, double-sided tape, fabric glue, hot melt glue, no-sew patch kits, or Velcro attachments. Choose what works best and stick it on!
How Do You Personalize a Backpack?
Let’s create texture variation with embroidered designs and iron-on applications. We’ll mix color-coordinated patches, add velcro attachments, and include customized accessories to express our unique style on backpacks.
What Is the Best Glue for Patches on Backpacks?
We recommend using fabric glue or sewing adhesive for secure patch attachment. For quick application, try heat-activated adhesives or iron-on patches. Avoid regular glue sticks – they won’t hold up over time.
Conclusion
Adding patches to your backpack brings a whole new dimension to your outdoor gear. The process is straightforward – whether you choose iron-on patches for a quick fix or take the time to hand-stitch them for extra durability. Not only do patches protect worn areas, but they also tell the story of where you’ve been and what matters to you. So grab your favorite patches, pick your attachment method, and start transforming that plain backpack into something that’s uniquely yours. Trust me, once you start customizing, you’ll wonder why you didn’t do it sooner!