Found gum stuck to your backpack? Here’s the short answer: freeze it for 30 minutes, scrape off the hardened chunk with a plastic card, treat any residue with isopropyl alcohol, and finish with soapy water. Most gum incidents resolve completely in under 30 minutes — with zero fabric damage — if you follow the right sequence.
- Freezing is the safest and most effective first step for any backpack material
- Fresh gum is significantly easier to remove than gum left overnight — act fast
- Isopropyl alcohol at 70%+ and Goo Gone effectively break down polymer residue on synthetic fabrics without damage
- A seasonal fabric protector spray creates a surface barrier that makes future removal significantly easier
Why Does Gum Stick So Stubbornly to Backpack Fabric?
Chewing gum isn’t just sugar and flavouring. It’s a carefully engineered blend of elastomers, resins, and waxes — the same class of polymers used in industrial adhesives. When fresh gum makes contact with fabric, those sticky polymer chains actively seek out microscopic surface irregularities to grip. Most modern backpacks are made from nylon or polyester, and both materials have a slightly rough weave at the microscopic level that gives gum plenty to latch onto. The bond forms within seconds of contact, and each passing minute makes it stronger.
The longer the gum sits, the worse it gets. Warmth from body heat or direct sunlight causes the polymers to flow deeper into the fabric fibres — a process materials scientists call “creep.” The sugars and artificial sweeteners in the gum also begin to caramelise into the weave, creating a secondary staining problem that’s entirely separate from the gum itself. Gum left for six or more hours is significantly harder to remove cleanly than gum addressed within 30 minutes. Every hour you wait, the job gets measurably harder.
If you’re out when you discover the gum, wrap a few ice cubes from any nearby café in a cloth and press it against the gum for three to four minutes. You won’t remove it in the street, but pre-freezing it stops the polymer creep and buys you time until you get home.
What Tools Do You Actually Need Before You Start?
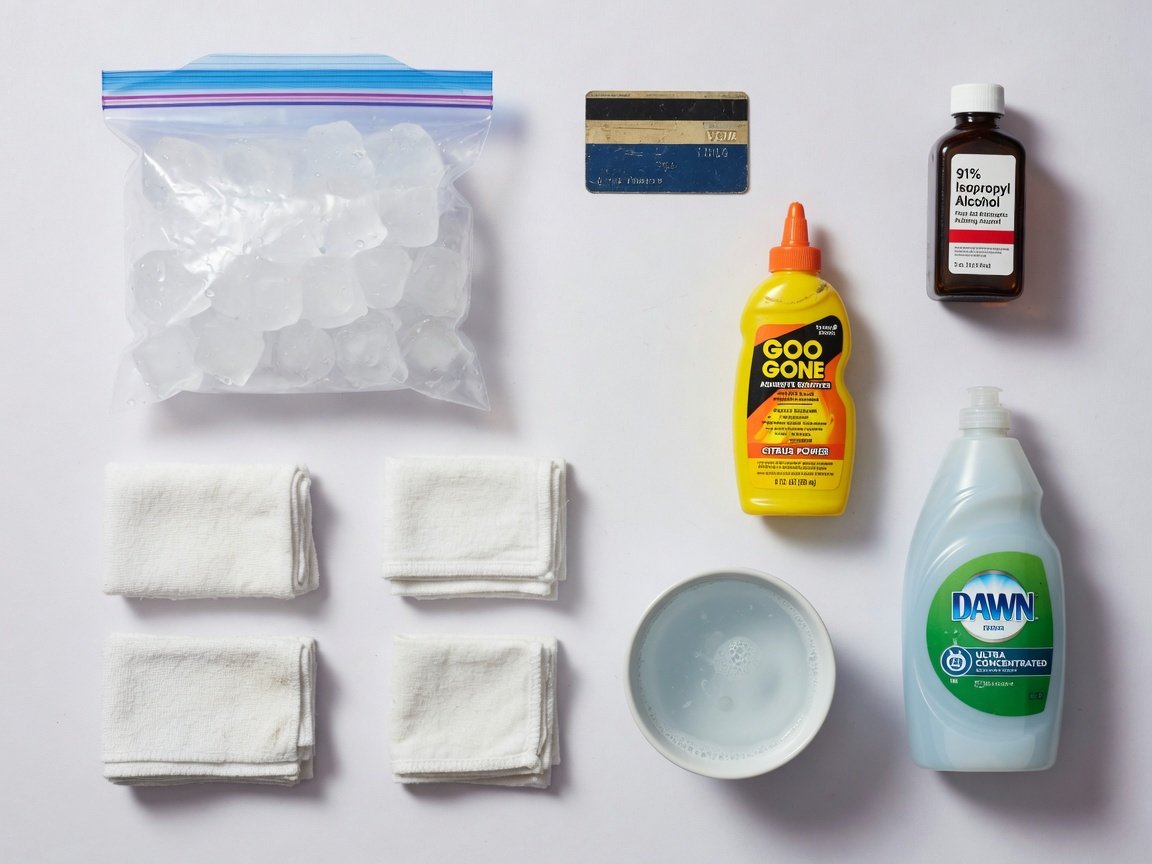
Having the right kit ready before you begin saves both time and fabric. The good news: most of what you need is already in your kitchen or medicine cabinet. The one tool people most commonly skip — a clean white cloth — turns out to be among the most important. Coloured cloths carry a real risk of dye transfer onto light-coloured backpack fabric when wet with solvents. Grab a white cotton cloth or white paper towels before you start.
| Tool | Purpose | Best Substitute |
|---|---|---|
| Plastic scraper or old credit card | Lifts hardened gum without cutting fibres | Wooden popsicle stick, plastic ruler |
| Ice cubes in a ziplock bag | Freezes gum for brittle, clean removal | Freezer (place the whole backpack inside) |
| Isopropyl alcohol (70%+) | Dissolves adhesive resin residue after scraping | Goo Gone, eucalyptus oil, WD-40 |
| Clean white cloths | Applying solvents and absorbing residue | White paper towels only — coloured ones risk dye transfer |
| Mild dish soap | Final clean after gum and residue removal | Gentle laundry detergent |
| Warm water | Rinsing the treated area | — |
One item that doesn’t appear in any table but makes a real difference: patience. Impatient, forceful scraping can cause more fabric damage than the gum itself. Gentle, controlled strokes will always outperform aggressive scrubbing. Set aside 30 uninterrupted minutes and you’ll get a far better result.
Does the Freezing Method Really Work — And How Cold Does It Need to Get?
Yes — freezing is the most effective and fabric-safe first-line method available, and for fresh gum it’s often all you’ll need. The science is straightforward: elastomer-based adhesives — the core material in chewing gum — lose their grip properties at temperatures between -10°C and -18°C. At those temperatures, the molecular bonds that allow gum to flex and adhere lose their elasticity. Instead of stretching, the gum becomes brittle and snaps off cleanly, leaving minimal residue behind. A standard home freezer running at -18°C achieves the required polymer brittleness in approximately 30 minutes for most gum blobs.
For a full backpack, empty the main compartment, leave the zips open, and place the bag in the freezer for 30 to 45 minutes. If the bag is too large for the freezer — common with travel packs above 50 litres — seal ice cubes in a ziplock bag and press it firmly against the gum for five to eight minutes. The targeted ice method works almost as well as whole-bag freezing for localised patches. The key is maintaining contact long enough for the gum to freeze all the way through, not just at the surface — partially frozen gum tears instead of snapping, which drags fibres with it.
Gum’s elastomers become brittle and lose adhesion at temperatures between -10°C and -18°C — well within the range of a household freezer. Full brittleness is typically achieved within 30 minutes of freezer exposure at -18°C.
When Should You Use Chemical Solvents Instead of Just Freezing?
Solvents come into play when freezing alone doesn’t finish the job. This is most common with old gum that has been sitting for days or weeks and has bonded deeply into the fibre structure, or with thick residue left on the fabric surface after mechanical scraping. The most effective and fabric-safe option for synthetic backpacks is isopropyl alcohol at 70% concentration or higher. At that concentration, it dissolves the resin components of gum without degrading nylon or polyester fibres — both of which are highly resistant to alcohol-based solvents.
Apply a small amount to a clean white cloth and work from the outside of the gum patch towards the centre. This inward technique prevents the dissolved residue from spreading into clean fabric. Let the solvent sit for 60 to 90 seconds before gently rubbing. Commercial adhesive removers like Goo Gone are also highly effective — they use citrus-derived d-limonene as the active agent, which breaks down the gum’s polymer structure. D-limonene is gentler than acetone-based products and significantly less likely to cause discolouration or degrade fabric coatings.
Always spot-test any solvent on an inconspicuous area first — a seam edge or interior lining patch works well. Some dyed fabrics bleed when they contact alcohol-based solvents, and DWR-coated (durable water repellent) fabrics on waterproof hiking packs can lose their coating if treated too aggressively. Acetone-based products can degrade DWR coatings in under 60 seconds of contact — avoid them entirely.
What Is the Complete Step-by-Step Gum Removal Process?
This six-step process works for both fresh and old gum on any synthetic backpack fabric. Follow the steps in order — skipping aftercare is the second most common mistake people make. Even when the gum is visually gone, invisible sugar residue left in the fabric re-attracts dirt and creates a sticky patch that gradually collects debris. The process takes 30 to 45 minutes including freeze time.
- Freeze the gum. Place the backpack in the freezer for 30–45 minutes, or press an ice-filled ziplock bag against the gum for 5–8 minutes until it hardens completely. Test by pressing lightly with your fingernail — frozen gum feels completely rigid.
- Scrape gently from the edges inward. Use a plastic scraper or old credit card held at a low angle (roughly 20–30 degrees to the fabric surface). Use short, controlled strokes working from the perimeter of the gum towards its centre. Do not gouge or press hard into the fabric.
- Re-freeze mid-scrape if needed. Gum warms quickly from friction and touch. If it becomes pliable before you’ve removed it all, press the ice pack against it again for two to three minutes before continuing. This is completely normal — plan for one or two re-freeze cycles on larger patches.
- Treat residue with solvent. Once the bulk of the gum is removed, dampen a clean white cloth with isopropyl alcohol (70%+) or Goo Gone. Dab — don’t rub — the remaining sticky area. Work in small circular motions from the outside of the patch inward. Let the solvent penetrate for 60–90 seconds before wiping.
- Clean with mild soapy water. Mix a few drops of dish soap in warm water. Dampen a clean cloth and wipe the treated area thoroughly. This step removes both solvent residue and any remaining sugar compounds from the gum.
- Rinse and air dry. Wipe the area with a clean damp cloth to remove soap. Allow the backpack to air dry at room temperature — at least two to four hours. Do not use a hairdryer, tumble dryer, or direct sunlight to speed up drying. Heat can re-soften any trace residue and may damage fabric coatings.
If you own a premium pack like an Osprey, Gregory, or Deuter, the same process applies — but treat the solvent step with extra care. The guide to Osprey backpack care covers the specific fabric coatings and hardware considerations for high-end packs before you apply any chemical treatment.
How Do You Remove Gum Stains After the Gum Itself Is Gone?
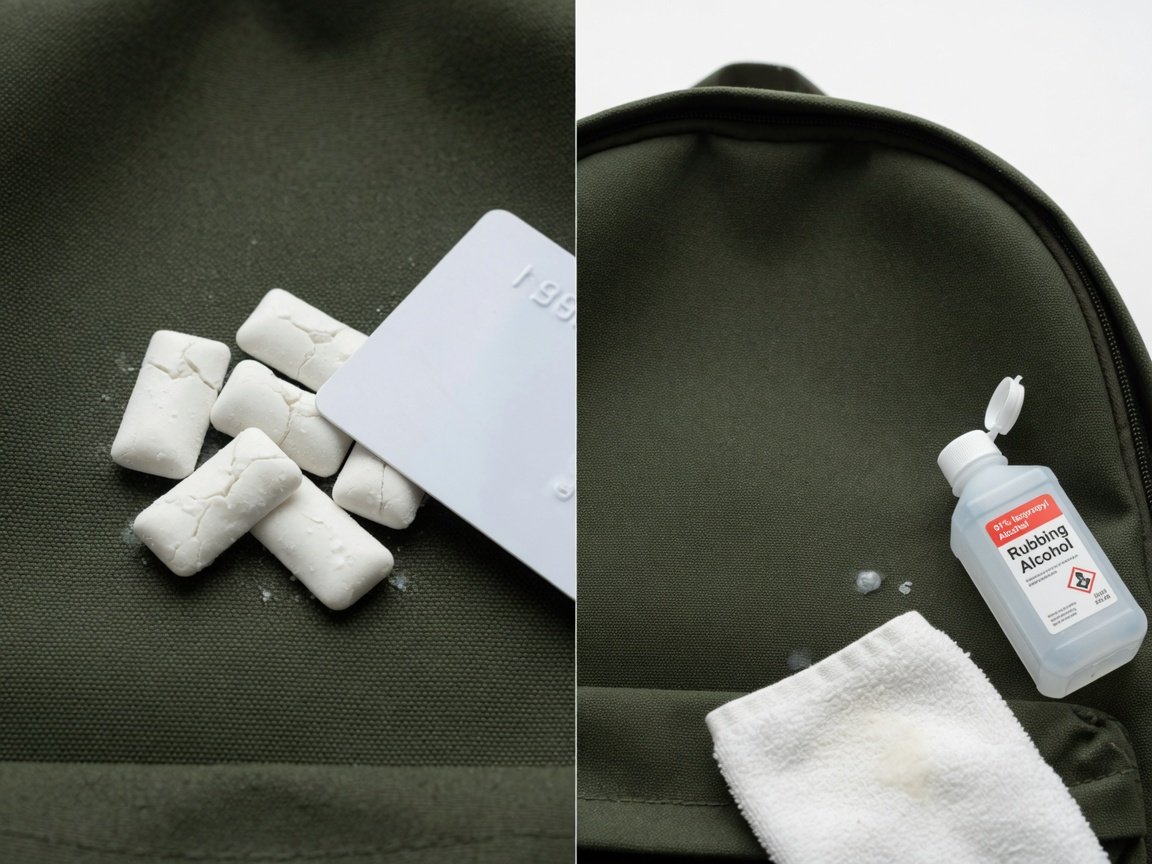
Successfully removing the gum is only half the job. Flavoured gum — particularly fruit or mint varieties — contains dyes and sugar compounds that leave faint discolouration on lighter fabrics. Treat these while the area is still slightly damp from your cleaning, before the staining has a chance to set permanently into the fibres.
For mild discolouration, a paste of baking soda mixed with a few drops of dish soap works well. Apply it to the stained area, let it sit for 10 minutes, then scrub gently with a soft toothbrush using circular motions. Rinse thoroughly with warm water. For more persistent staining — especially from brightly coloured gum — white vinegar applied before the baking soda treatment helps. Vinegar’s mild acidity (typically 5–8% acetic acid concentration in white vinegar) breaks down caramelised sugar bonds without harming synthetic fabrics. Apply warm vinegar, let it soak for five minutes, then follow with the baking soda paste.
Once you’ve addressed the stain, it’s worth giving the whole bag a proper clean. A full wash resets the fabric and removes any trace solvent smell. The complete step-by-step backpack washing guide covers hand-washing and machine-washing protocols for every major fabric type — ideal for a full reset after any contamination incident.
Can You Remove Gum from Leather and Specialty Backpack Materials?
Yes — but leather and specialty materials require a modified approach. The freezing method still works and is recommended as your starting point, but use an ice pack wrapped in a dry cloth rather than placing the bag directly in the freezer. Direct cold air exposure for 30+ minutes can dry out leather, causing surface cracking and micro-splits in the grain. Once the gum is frozen, scrape it off gently with a plastic tool. The fundamental technique is the same — the critical difference is what you use afterwards.
Do not use isopropyl alcohol on leather. It strips the natural oils that keep leather supple and can cause permanent cracking or discolouration. Instead, use a small amount of olive oil or coconut oil applied with a cloth — the triglycerides in plant-based oils penetrate the gum’s polymer structure and break its grip without harming the leather. After residue removal, always apply a quality leather conditioner to restore moisture. For canvas and coated waterproof fabrics, see the material-by-material guide below.
| Backpack Material | Safe Removal Methods | Avoid |
|---|---|---|
| Nylon / Polyester | Freezing, isopropyl alcohol, Goo Gone, white vinegar | Acetone, bleach, high heat |
| Canvas | Freezing, mild soap, diluted isopropyl alcohol | Harsh solvents, excessive water saturation |
| Leather | Freezing (cloth barrier), olive oil, coconut oil, leather-safe remover | Isopropyl alcohol, acetone, vinegar, direct freezer exposure |
| DWR-Coated / Waterproof | Freezing, gentle scraping, Goo Gone (spot-tested first) | Acetone, aggressive scrubbing, strong solvents |
| Mesh Panels | Freezing (essential), fine-tipped plastic tool, diluted alcohol on cotton swab | Aggressive scraping (mesh tears), soaking |
What Aftercare Should You Do Once the Gum Is Out?
The 10 minutes you invest in aftercare determines whether your backpack looks as good as new or shows a ghost of the incident for years. First priority: ensure the treated area is completely dry before storing the bag. Moisture trapped under a solvent-treated patch creates ideal conditions for mildew — which is far harder to remove than gum and carries a persistent odour. Air dry at room temperature for a minimum of two hours, and squeeze the treated area gently to confirm no moisture is trapped in the fill layer or padding underneath.
Once dry, inspect the treated area in direct light and run your fingers over it. Any residual tackiness means another pass of solvent and a second clean. When it’s completely residue-free, apply a fabric protector spray across the entire exterior of the bag. Quality fabric protector sprays reduce surface adhesion — including the adhesion of sticky substances like gum — compared to unprotected fabric. Gear specialists recommend reapplying every three to six months for daily-use bags and at the start of each season for outdoor or travel packs.
Consistent care like this is what separates gear that lasts a decade from gear that degrades in three years. The ten expert tips for extending your backpack’s lifespan lay out a full maintenance framework — covering everything from zipper care to storage habits — that goes well beyond single-incident repair.
Alternative Methods and Key Removal Principles
The consensus among experienced gear care professionals has shifted clearly in recent years. The old folk advice — soak with warm water and scrub hard — is now firmly discouraged. Current thinking from textile technicians and materials scientists emphasises cold-first removal to preserve fabric integrity, with chemical treatments reserved for residue only, not bulk removal.
The most common mistake is going straight for solvents without freezing first. Freezing often removes the bulk of the gum without any chemical products at all — and your fabric stays in better condition. The key distinction: cold addresses mechanical adhesion, while solvents address chemical adhesion. Deal with the mechanical part first.
Hairspray is a folk remedy that genuinely works — most formulas contain enough alcohol to partially stiffen the gum for scraping. Dedicated isopropyl alcohol gives a cleaner result and doesn’t leave its own residue behind. If you travel frequently, a 100ml bottle in your pack handles gum, adhesive label residue, and dozens of other maintenance tasks.
Peanut butter is a classic home remedy — the oils do break down gum polymers. But it leaves a greasy residue that needs its own cleaning pass, and on light-coloured fabric it can introduce a secondary staining problem. For backpacks, purpose-made adhesive removers or isopropyl alcohol are faster, cleaner, and less likely to create a second problem.
How Do You Stop Gum from Sticking to Your Backpack Again?
Prevention is far simpler than cure. A few habit changes and one seasonal product application will cut your risk dramatically. The single most impactful change: stop placing your backpack on public floors, bus seats, pavement, and café chairs. These are the primary transfer vectors for gum — eliminating surface contact eliminates the majority of incidents. A pocket-sized bag hook (most weigh under 30g) lets you hang your bag almost anywhere and is worth adding to your everyday carry kit.
| Prevention Strategy | How to Implement It | Effectiveness |
|---|---|---|
| Fabric protector spray | Apply at start of season; reapply every 3–6 months | High — creates a barrier against surface adhesion |
| Surface awareness | Use a bag hook; check surfaces before placing your bag | Very high — removes risk at source |
| Weekly wipe-down | Damp cloth over the exterior once a week | Medium — removes early adhesion before it bonds |
| Quick response protocol | Carry a small cold pack or ziplock for ice when travelling | High — pre-freezing stops polymer creep in its tracks |
| Regular deep cleaning | Full wash every 1–3 months depending on use frequency | Medium — keeps fabric sealed against contaminants |
Forming good habits around how you pack and carry your bag also helps. When a pack is properly loaded and balanced, it sits on your back naturally rather than getting thrown down on any available surface. The guide on mastering the art of backpack packing covers loading principles that make your bag feel better to carry — which in turn makes you less inclined to dump it carelessly.
Frequently Asked Questions About Removing Gum from a Backpack
Can I use hairspray to remove gum from my backpack?
Yes — hairspray works as an emergency option. Most formulas contain 30 to 55% alcohol by volume, which stiffens and partially freezes the gum for easier scraping. The downside is that hairspray leaves its own sticky polymer residue behind, which then needs a separate cleaning step. Rubbing alcohol or a dedicated adhesive remover is a cleaner, faster solution if you have access to it. Hairspray is best saved for situations where you have nothing else available.
Does vinegar actually work on old, hardened gum?
Vinegar can help with old gum, though it works better as a secondary treatment than a standalone solution. Apply warm white vinegar to the affected area and let it soak for five to ten minutes — the mild acidity softens the caramelised sugar bonds that form when gum ages in fabric. Follow with mechanical scraping (re-freeze first if possible) and then treat residue with isopropyl alcohol. For gum that has been sitting for weeks, combining vinegar-soak and freezer together — vinegar soak first, then freeze — gives the best results of any home method.
Will gum removal damage my waterproof backpack’s DWR coating?
Freezing and gentle mechanical scraping won’t harm a DWR coating. Aggressive scrubbing and strong solvents — especially acetone-based products — can degrade DWR in under 60 seconds of contact, so avoid those. Isopropyl alcohol at 70%, used briefly and wiped clean promptly, is generally safe for DWR fabrics but always spot-test first. After treatment, you may want to re-apply a DWR spray to the treated section to restore its full water resistance. Most outdoor gear brands sell compatible DWR refresh sprays for this purpose.
Is it safe to put my entire backpack in the freezer?
Yes — for most backpacks this is the easiest and most effective approach. Empty the main compartment, leave all zips open, and freeze for 30 to 45 minutes. Metal hardware like zips, clasps, and buckles is completely unaffected by brief freezer exposure. The exception is leather bags — direct freezer air for extended periods can dry out leather and lead to surface cracking. For leather, use a cloth-wrapped ice pack pressed against the gum instead.
Is Goo Gone safe to use on all backpack fabrics?
Goo Gone is safe on most synthetic fabrics — nylon, polyester, and canvas are all fine. It’s not recommended for leather, suede, or silk without a specialist leather-safe formula. Always spot-test on a hidden area (a seam edge or interior panel) before applying to a visible surface. Apply a small amount, let it sit for 60 seconds, then wipe clean with a cloth. Crucially, follow with a soap-and-water rinse to remove the citrus-solvent residue — if left in the fabric, it acts as a mild attractant for dust and dirt.
Can professional dry cleaning remove stubborn gum that home methods can’t?
Yes. Professional dry cleaners have access to commercial-grade adhesive solvents and steam equipment that can handle even deeply bonded gum residue. It’s worth considering if home methods have failed after two or three attempts, or if you’re dealing with a high-value bag where you don’t want to risk DIY damage. Most dry cleaners can handle the job within 24 to 48 hours. Tell them the fabric type and exactly what products you’ve already used — this helps them choose the right solvent for the remaining residue.
How do you remove gum from a backpack’s mesh pocket?
Mesh is trickier than flat fabric because gum can work into the open weave. Thorough freezing is even more important here — scraping soft gum on mesh pushes it deeper into the holes rather than lifting it off. Once fully frozen, use a fine-tipped plastic tool (a blunt toothpick or the corner of a plastic card) to lift gum from individual mesh holes. Follow with a cotton swab dipped in diluted isopropyl alcohol to clean residue from the mesh strands. Work methodically — this takes longer than flat fabric but produces a clean result without tearing the mesh.
Your 2026 Action Plan: Three Steps to a Gum-Free Backpack
Removing gum from a backpack is entirely manageable when you follow the right sequence. Freeze first, scrape second, solvent-treat residue third — that three-stage process handles the vast majority of gum incidents on any backpack material. Remaining cases (very old gum, specialty materials, deep staining) respond to the extended methods covered in this guide or, as a last resort, professional cleaning.
Here’s your implementation timeline:
- Right now (if gum is fresh): Get ice on the gum immediately. At home, the whole bag goes in the freezer for 30 minutes. Out and about, press a cloth-wrapped ice pack against it to slow polymer creep.
- Within the hour: Scrape off the frozen gum with a plastic card, treat any residue with isopropyl alcohol or Goo Gone, clean with soapy water, rinse, and air dry.
- Once dry (2–4 hours): Check for staining in direct light. Apply a baking soda paste if needed. Consider a full bag wash if the incident was particularly messy.
- This week: Apply a fabric protector spray across the entire exterior. It takes five minutes and dramatically reduces adhesion from future gum and other contaminants.
- Going forward: Build the surface-awareness habit. Check before you set your bag down. It takes three seconds and prevents the whole problem from recurring.
A well-maintained backpack lasts years longer than a neglected one. Gum removal is one small part of that picture. Handle it quickly, handle it correctly, and your pack will look just as good next year as it does today.