The secret to a great backpacking trip starts before you take a single step — it starts with how you pack. Pack correctly and your miles feel manageable. Pack wrong and every climb feels twice as brutal. Here’s exactly how to pack for backpacking so your back stays happy, your gear stays dry, and your adventures stay fun.
Key Takeaways
- Your total pack weight should stay at or below 20–25% of your body weight — experienced backpackers aim for a base weight under 15 lbs.
- Heavy, dense items belong in the middle zone of your pack, pressed close to your spine — this keeps your center of gravity stable and reduces fatigue.
- A well-organized pack can cut setup time at camp by up to 30 minutes each evening simply through consistent gear placement.
- Layering your gear by access frequency — rarely used items at the bottom, frequently needed items near the top — is the single most practical packing habit you can build.
Why Does Packing Strategy Matter More Than the Gear You Choose?
Most new backpackers obsess over which gear to buy. Experienced backpackers obsess over how to pack it. That distinction matters more than most people expect. Outdoor educators consistently point to improper load distribution — not total pack weight — as the leading cause of trail-related back and shoulder fatigue. A 35-lb pack loaded correctly feels significantly lighter than a 28-lb pack loaded haphazardly.
The physics are straightforward. When heavy items sit close to your spine and near your body’s center of gravity, you carry the load efficiently. When those same items hang away from your back or sit too low, your muscles compensate constantly — and that compensation is exhausting. Research on load carriage suggests a poorly balanced pack can increase perceived exertion by up to 30% compared to an optimally loaded pack of identical weight.
Beyond comfort, smart packing means you’re not digging through your entire bag at the trailhead to find your rain jacket. Everything you need in a hurry — snacks, map, first aid kit, headlamp — should be immediately accessible. That level of organization only happens when you have a system. Building that system is what this guide is for.
How Much Should Your Backpacking Pack Actually Weigh?
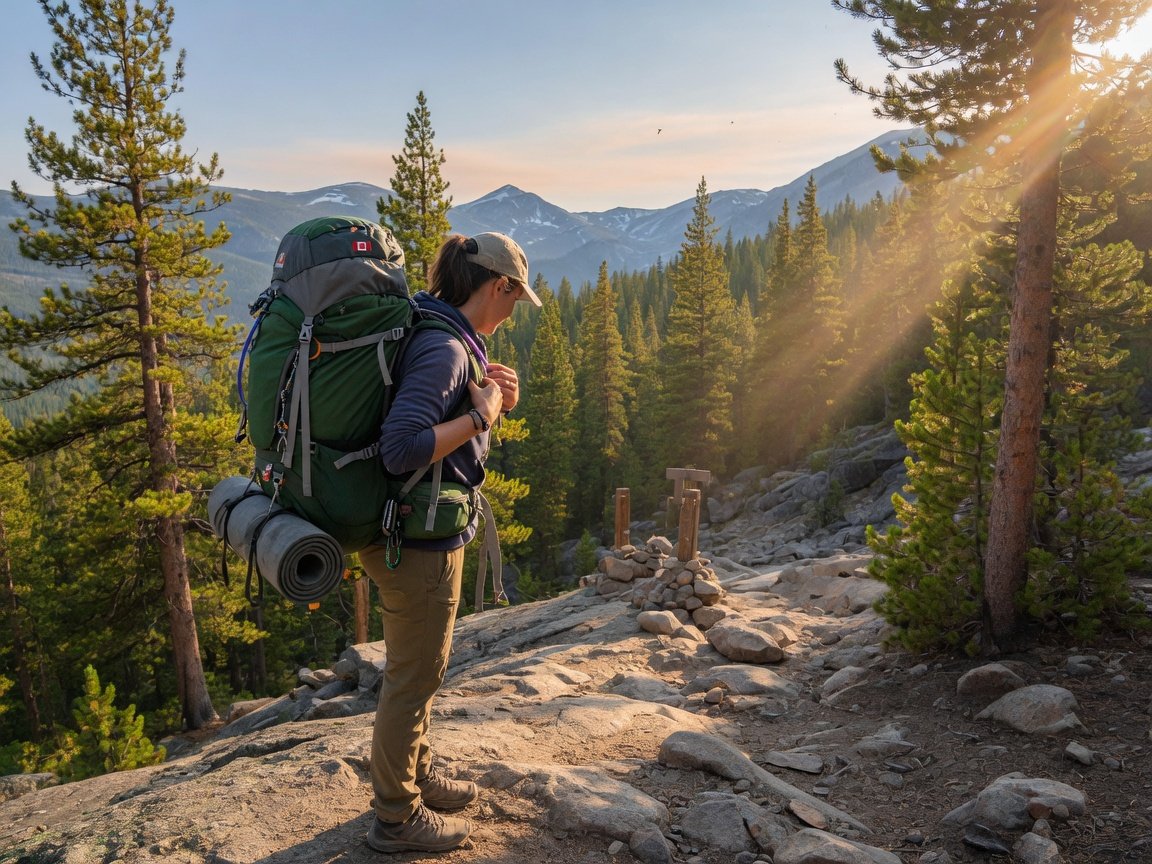
Weight is the single most debated topic in backpacking circles, and for good reason. The general guideline most wilderness guides recommend is keeping your total pack weight at no more than 20–25% of your body weight. For a 160-lb hiker, that’s 32–40 lbs maximum — though most experienced backpackers will tell you to push that number as low as possible.
The ultralight community defines “base weight” — everything in your pack except food, water, and fuel — as under 10 lbs. Traditional backpackers typically carry a base weight of 15–20 lbs. The right number depends on your trip length, terrain, and personal comfort level. A three-day summer trip in the Cascades demands a very different approach than a week-long expedition into a remote wilderness area in late fall.
Here’s a practical weight breakdown to aim for on a 3-day trip:
| Category | Lightweight Target | Traditional Target |
|---|---|---|
| Shelter (tent/tarp) | 1.5–2.5 lbs | 3–5 lbs |
| Sleep system | 1.5–2.5 lbs | 3–5 lbs |
| Pack itself | 2–3 lbs | 4–6 lbs |
| Clothing layers | 2–3 lbs | 3–5 lbs |
| Kitchen and food system | 1–1.5 lbs | 2–3 lbs |
| Food (per day) | 1.5 lbs/day | 1.75 lbs/day |
| Water (varies by source frequency) | 1–2 lbs carried | 1–2 lbs carried |
Before you head out, always run through a thorough gear checklist to make sure you haven’t overpacked nonessentials or overlooked anything critical. Getting that balance right upfront saves real pain on the trail.
What Gear Do You Actually Need to Pack?
The Ten Essentials framework — originally developed by The Mountaineers and regularly updated for modern hikers — remains the gold standard for deciding what earns a spot in your pack. Every item should justify its presence by being essential for safety, necessary for shelter, or genuinely improving your trip quality. If it doesn’t meet at least one of those criteria, it’s a candidate for the car.
Your core gear list should cover these ten categories:
- Navigation — map, compass, GPS device, or downloaded offline maps on your phone
- Illumination — headlamp with extra batteries (modern LED headlamps deliver 50–100 hours of runtime on a single set)
- Sun protection — sunscreen (SPF 30 or higher), UV-blocking sunglasses, wide-brimmed sun hat
- First aid — blister care, pain relievers, wound closure strips, any personal prescriptions
- Knife or multi-tool — for food prep, gear repair, and emergency situations
- Fire starting — lighter, waterproof matches, and a few fire starter cubes as backup
- Shelter — tent, tarp, bivy, or at minimum an emergency space blanket
- Food and cooking system — calorie-dense meals, stove, fuel canister, and a lightweight cookpot
- Water and filtration — 2–3 liters of carrying capacity plus a reliable filter or purification method
- Clothing layers — base layer, insulating layer, and a hardshell rain jacket; always pack for conditions 20°F colder than the forecast
Notice what’s missing from that list: extra pairs of jeans, three paperback novels, a full-sized pillow, and half a dozen “maybe I’ll need it” items. Every ounce you cut from nonessentials is an ounce your knees and shoulders thank you for on mile 8.
How Do You Layer Your Pack for Maximum Comfort?
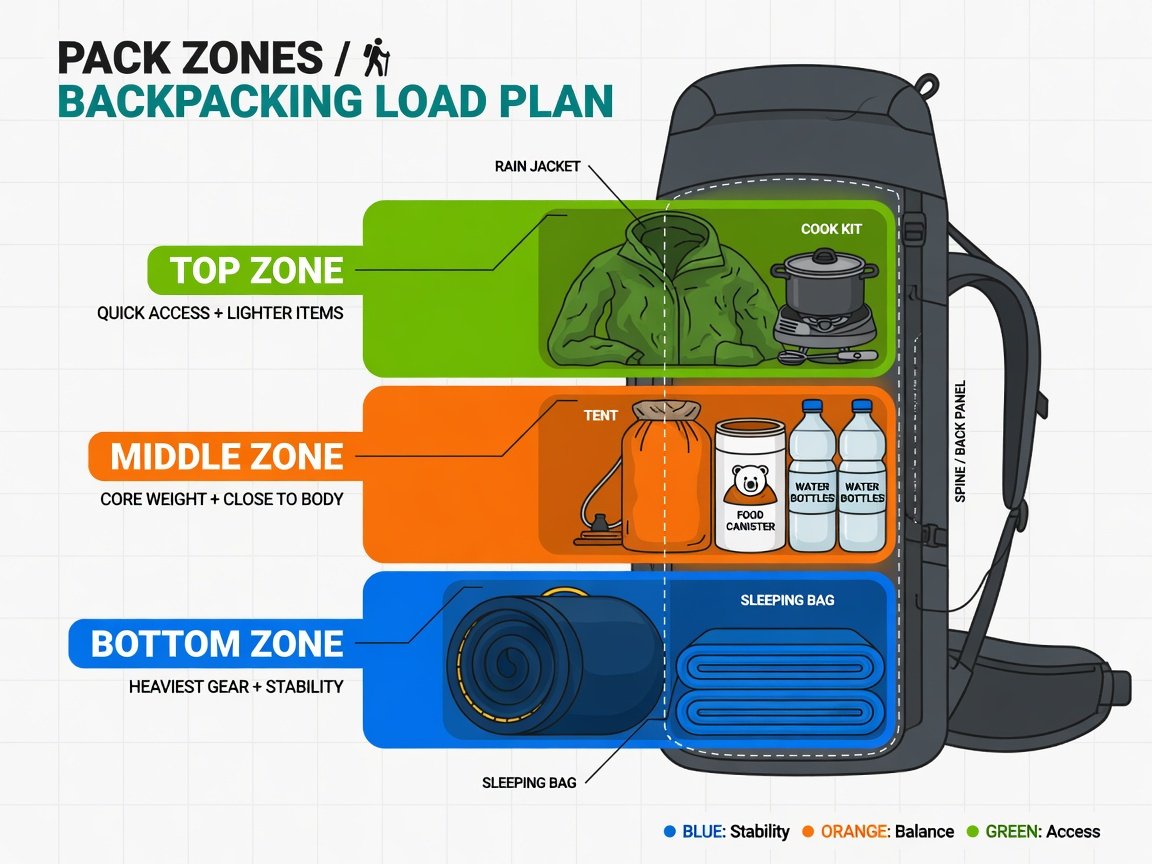
Think of your pack in three horizontal zones — bottom, middle, and top — plus two external zones (hip belt pockets and the top lid). Getting the right gear into each zone is what transforms a long day into a manageable one.
Bottom Zone: Light, Bulky, and Infrequently Needed
The bottom of your pack is reserved for items you won’t touch until you reach camp. Your sleeping bag — compressed in its stuff sack — goes here first. These items are lightweight and compressible, which means they fill space without destabilizing your load. If your sleeping pad is an inflatable model, it can often be rolled and slid inside against the back panel. If it’s a foam Z-pad, strap it to the outside bottom of the pack instead.
Middle Zone: Heavy, Dense, and Right Against Your Back
This is the prime real estate of your pack, and it’s where your heaviest items live — pressed close to your spine at roughly shoulder-blade level. Your tent body and poles (if they fit inside), food canister, main water supply, and stove fuel all belong here. Keeping dense weight in this zone and close to your spine reduces the forward pull that causes lower back strain. Load carriage studies consistently show that high, central weight placement reduces energy expenditure compared to low or rearward placement — sometimes by a meaningful margin over a full day of hiking.
Top Zone: Medium Weight and Frequently Accessed
Rain gear, insulating layers you might pull on during a rest break, your cook kit for a quick lunch stop, and your food bag (if you’re not using a hard-sided canister) all do well here. These are things you’ll reach for multiple times throughout the day. Stuffing your rain jacket at the bottom when afternoon storms roll through routinely is a mistake that only needs to happen once before you reconsider your system.
How Do You Pack Your Sleep System the Right Way?
Your sleep system — sleeping bag, sleeping pad, and pillow — makes up one of the bulkiest portions of your pack. Getting it loaded correctly sets up everything else that goes in after it.
Compress your sleeping bag into its stuff sack as tightly as possible, then push it all the way to the bottom of the main compartment. Modern compressible down bags can be squeezed to roughly the size of a football, leaving significantly more room for everything else. Down bags compress better than synthetic fill, though synthetic performs better when wet — a real consideration in rainy climates.
For your sleeping pad, you have a choice: inside or outside the main compartment. Inflatable pads can often be rolled tightly and slid inside along the back panel, where they provide helpful structure and a makeshift frame. Foam Z-pads are too rigid for inside and strap best to the outside of the pack — either on the bottom or flat against the back. Anything strapped to the outside can snag on brush, so secure it with the dedicated attachment points and give it a firm tug before you head out.
A great night of sleep makes every hard day on trail feel worth it. If you want to dive deeper into maximizing your overall backcountry comfort beyond just the pack itself, that’s a rabbit hole worth going down before your next trip.
How Should You Handle Food and Water Inside Your Pack?
Food and water are among your heaviest consumables, and managing them intelligently makes your pack feel progressively lighter as the trip progresses — which is a great psychological and physical win on long routes.
Water weighs 2.2 lbs per liter. Carrying 3 full liters at once is heavy. The smarter approach is to rely on a quality filter and source water frequently along the trail, keeping your carried supply closer to 1–1.5 liters between sources. This keeps your moving weight meaningfully lower across a full day. Choosing the right water filter for your specific trip style — squeeze filter, pump, or UV pen — can save both weight and time out there.
For food, plan on roughly 1.5–2 lbs of food per person per day, targeting 100–125 calories per ounce. High-calorie, low-weight foods — nuts, nut butters, freeze-dried meals, olive oil, hard cheeses, and dark chocolate — are trail staples for good reason. Pack your daily food portions into labeled ziplock bags or color-coded stuff sacks so you’re not sorting through the entire food bag just to find breakfast. If you prefer a low-carb approach, there are solid keto-friendly backpacking meal strategies that hit the calorie density targets without relying heavily on carbohydrates.
In bear country — and that includes most designated wilderness areas in North America — you’ll need either a hard-sided bear canister or to hang your food using a proper bear hang at least 200 feet from your campsite. Bear canisters add 2–3 lbs empty but are mandatory in many national parks and dramatically less stressful than a midnight bear encounter. When a canister is required, load it into the middle zone of the pack against your back.
Your cooking setup — stove, fuel canister, and pot — can live in the middle zone or near the top of the main compartment depending on whether you’re stopping to cook at lunch. Modern canister stoves weigh as little as 2.6 oz and boil a liter of water in under 4 minutes, which makes them an easy win on both weight and convenience. Digging into the best stove options for backcountry cooking is worth your time if you’re still running heavy in that department.
What Goes in Your Hip Belt Pockets and Top Lid?
These two zones are where smart backpackers stash their most-used items — the things they reach for 10 or 20 times a day without ever stopping to drop the pack. Using them strategically separates organized hikers from the ones constantly rummaging at the side of the trail.
Hip Belt Pockets
Most mid-to-large backpacking packs include small zippered pockets on each hip belt strap. These are genuinely invaluable for items you need while moving — trail snacks, lip balm, sunscreen, your phone for photos, electrolyte packets, and maybe a small folding knife. The rule for hip belt pockets is simple: if you’d have to stop and take off the pack to reach it, it probably doesn’t belong there.
Top Lid (The Brain)
The top lid — sometimes called the “brain” — is the small compartment that sits above the main opening of your pack. This is the home for your navigation tools, headlamp, first aid kit, toilet kit, camp shoes if you carry them, and anything you need during trailhead setup or the first few minutes at camp. Keep the top lid light: overloading it pulls the pack backward and throws off your balance. If your pack has a detachable lid that converts to a fanny pack, that’s a bonus feature worth using on summit-day side trips.
Some ultralight packs have dropped the top lid in favor of a roll-top closure, saving a few ounces but eliminating easy external organization. Whether or not your pack has a lid, the principle holds — create a consistent quick-access zone and use it the same way every single trip until packing becomes automatic muscle memory.
How Do You Weatherproof Your Pack?
Rain happens. Sometimes it happens hard and sideways for hours. Most backpacking packs are water-resistant but not waterproof, and the difference matters enormously when you’re 8 miles from the nearest shelter and a storm moves in faster than the forecast suggested.
The two main weatherproofing strategies are pack covers and liner bags. Pack covers (a coated shell that fits over the exterior of your pack) deploy fast and keep rain off the pack fabric. The downside: they don’t protect against water that runs down your back and soaks in around the shoulder straps. Liner bags — a heavy-duty contractor bag or a dedicated waterproof pack liner inserted inside the main compartment — are more reliable because they seal your gear regardless of where water enters from.
Many experienced backpackers use both. The cover keeps the outside fabric from absorbing water and getting heavier as it saturates (wet nylon is surprisingly heavy over time). The liner bag keeps your sleeping bag, down jacket, and electronics completely dry no matter what. For extra insurance on truly critical items, add individual dry sacks or heavy-duty ziplock bags inside the liner.
One more step worth taking: apply a DWR (Durable Water Repellent) refresh spray to your pack once a season or whenever you notice water soaking in rather than beading off the fabric surface. DWR degrades with UV exposure and washing, and refreshing it takes roughly 5 minutes with a spray bottle and a short dryer cycle on low heat.
How Do You Fit and Adjust Your Pack Before Hitting the Trail?
Even a perfectly packed bag will make you miserable if it isn’t fitted and adjusted correctly. Pack fit is the most overlooked aspect of backpacking preparation — and it costs nothing to get right.
- Load the pack fully before adjusting — an empty pack sits differently than a loaded one, and the fit you dial in empty won’t hold when weight is added.
- Loosen all straps before you put the pack on so you’re starting from zero each time.
- Position the hip belt so the padding wraps around your hip bones (iliac crest), not your waist. This is a critical distinction — the hip belt should sit on bone, not soft tissue.
- Tighten the hip belt firmly — snug enough to carry 70–80% of the pack’s total weight, but not so tight it cuts circulation.
- Pull the shoulder straps down and back until they conform to your shoulders with no gaps. There should be roughly an inch of clearance between the top of the shoulder and the strap lifters.
- Tighten the load lifter straps (the short straps connecting the top of the shoulder straps to the pack frame) to a roughly 45-degree angle. These pull the top of the pack toward your upper back, preventing it from tipping away from you.
- Clip and lightly tighten the sternum strap across your chest — this reduces shoulder strap sway without restricting breathing. It should feel stabilizing, not compressing.
- Check your balance by leaning forward slightly — the pack should follow your movement rather than pulling you backward.
Repeat these steps every morning on trail, since straps loosen overnight and shift during the first mile of hiking. A two-minute adjustment routine before each day makes a measurable difference in how your back feels by mile 5.
The footwear you choose compounds with pack weight in ways that can define your whole experience out there. Finding the right fit in your trail shoes or boots reduces fatigue and hot spots significantly on long days, especially when you’re carrying a loaded pack for hours at a stretch.
What Are the Most Common Packing Mistakes (and How Do You Fix Them)?
Even experienced backpackers occasionally fall back into old habits. Here are the five mistakes that show up most often on trail — and the straightforward fixes that eliminate them.
Mistake 1: Overpacking “Just in Case” Items
The “what if” mindset is the enemy of a light pack. Trip debriefs consistently show that first-time backpackers overpack by 20–40% compared to what they actually use on trail. The fix: after every trip, write down what you never touched. Those items get pulled from the pack permanently. Over 3–5 trips, your kit gets leaner and more intentional without sacrificing safety.
Mistake 2: Heavy Items Sitting Too Low in the Pack
Loading your tent and food canister at the bottom and your sleeping bag on top seems intuitive — but it’s physically counterproductive. Heavy items sitting low and away from your spine create a swinging pendulum effect that stresses the lower back with every step. Move your heaviest, densest items to the middle zone against your spine instead, and you’ll feel the difference within the first mile.
Mistake 3: Ignoring Pack Compression
Loose items shift inside the pack as you hike, and that shifting throws off your balance in ways you feel cumulatively rather than all at once. Use compression sacks for your sleeping bag, stuff clothing into every available void and gap, and use your pack’s internal compression straps to cinch the load tight before you start hiking. A compressed pack is a stable, predictable pack.
Mistake 4: Burying Critical Gear Where You Can’t Reach It
Your rain jacket at the bottom of the main compartment, your headlamp wedged behind the food canister, your first aid kit buried under your sleeping bag — these are all frustrations waiting to happen. Apply the rule of frequency: items you access daily go near the top or in external pockets. Items you use once at camp go at the bottom. It’s a simple rule, but following it consistently eliminates most mid-trail aggravation.
Mistake 5: Skipping the Pre-Trip Shakeout Hike
Loading your pack and driving immediately to the trailhead for a 5-day trip is a risky move. A loaded 3–5 mile shakeout hike the week before reveals pressure points, balance problems, chafing spots, missing items, and anything rubbing wrong — before any of it actually matters. This one habit prevents a disproportionate percentage of first-day problems and takes less than two hours of your life.
Frequently Asked Questions About How to Pack for Backpacking
How do I keep my backpacking pack from being too heavy?
Start with a base weight audit — lay out every single item and weigh it individually. Then ask honestly: is this essential for safety, shelter, or navigation? If the answer is no, consider leaving it home. Focus your weight savings on the “big three” — shelter, sleep system, and the pack itself — since those categories offer the biggest potential reductions. Swapping a 6-lb tent for a 2.5-lb shelter system saves more than a dozen small gear swaps combined.
Should I use dry bags inside my backpack?
Yes, particularly for your sleeping bag, down insulation, electronics, and spare clothing. Even with a pack cover in place, water finds its way in through seams, zipper pulls, and anywhere a strap attaches to the pack body. Individual dry sacks or heavy-duty ziplock bags inside a pack liner are the most reliable protection available. Color-coding your dry bags by category also doubles as an organizational system.
Where should I put my tent in my backpack?
Tent body and rainfly belong in the middle zone, pressed against your back. You can stuff them together in the tent stuff sack (or in a dry bag if you’re packing up a wet tent). The poles should be broken down to their shortest length and slid vertically along the inside wall of the main compartment — never leave poles loose inside where they can puncture your sleeping bag or poke through pack fabric. If the poles are too long to fit inside, strap them vertically to the outside of the pack.
How do I pack differently for a multi-night trip versus a day hike?
Day hikes allow a dramatically simpler loadout — no tent, sleeping system, or full cook setup required. For multi-night trips, the zone system becomes essential because you’re dealing with significantly more volume and weight spread across multiple days. Pack consumables (food and fuel) where they’re easy to reach and reorganize daily, since your pack naturally gets lighter as you eat through your supplies — and you’ll want to rebalance as that weight shifts.
Can I attach gear to the outside of my backpack?
Yes, but use real restraint. The best external candidates are bulky but lightweight — a sleeping pad, trekking poles through their strap loops, or a wet tent drying out as you hike. Heavy items should never go on the outside of the pack; off-center external weight compromises your balance and creates dangerous instability on technical terrain. Secure everything with dedicated attachment points and give each item a firm tug before starting.
How do I organize my pack so I can find things quickly on trail?
Consistency is the only answer that actually works. Pack the same items in the same places on every single trip. Over time, your hands develop muscle memory — you’ll know exactly where the headlamp lives, where the snacks are, and where the first aid kit is without thinking about it. Use brightly colored or distinctively textured stuff sacks for frequently needed items so you can find them by feel inside a dark main compartment. A few extra minutes of deliberate organization before you leave the trailhead saves 20 minutes of rummaging frustration on trail.
Pack Smart and Hit the Trail With Confidence
Learning how to pack for backpacking is a skill that gets faster and more intuitive with every trip. You don’t need to nail it perfectly on day one — you just need a solid system to start with and the discipline to refine it as you go.
Here’s a simple implementation timeline to get you trail-ready:
- This week: Weigh every item in your current kit. Cut anything you haven’t used in your last 3 trips. Be ruthless.
- Before your next trip: Load your pack using the zone system — sleep system at the bottom, heavy items in the middle against your back, frequently needed items near the top.
- One week before departure: Do a loaded shakeout hike of 3–5 miles with your full gear. Note anything that rubs, pinches, or throws off your balance.
- Morning of the trip: Spend 5 minutes fitting and adjusting — hip belt first, then shoulder straps, then load lifters, then sternum strap.
- After the trip: Write down one thing you overpacked and one thing you wished you had. Adjust before the next trip.
Great backpacking starts at home, not on the trail. Take the time to pack right, and every mile you cover will feel like the adventure it’s supposed to be.
—