Packing a dress shirt in a backpack doesn’t have to end in a crumpled mess. With the right fold — and the right spot in the bag — your shirt can arrive looking sharp without an iron in sight. The key is knowing exactly how to fold it, where to place it, and what to protect it with.
Quick Takeaways
- Button the shirt fully before folding — it holds the fabric taut and prevents crease lines from forming during the fold.
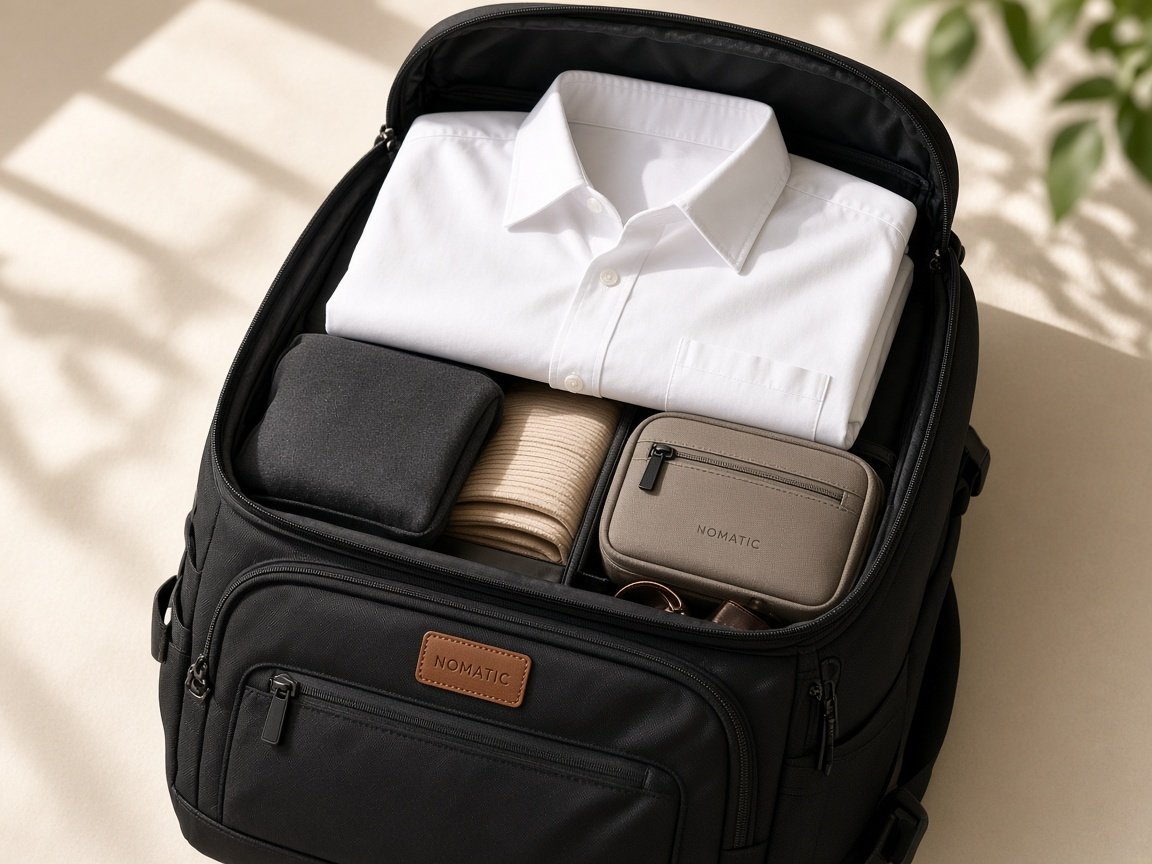
- Place the folded shirt at the top of the main compartment, never at the bottom where heavier items create sustained pressure.
- Packing cubes and compression folders keep the fold locked in shape through the whole journey.
- A clamshell-opening travel backpack is significantly easier to load with a dress shirt than a top-loader design.
Why Does a Dress Shirt Wrinkle So Easily in a Backpack?
Dress shirts are made from woven fabrics — cotton, poplin, chambray, fine twill — that crease when compressed under uneven pressure. A backpack applies that pressure in unpredictable directions. The contents shift with every step you take. The bag gets set down sideways and upright. Heavier items press against lighter ones. That’s very different from a flat-packed suitcase where clothes stay stacked in a single layer.
The collar and front placket (the button strip) are the most vulnerable parts. They contain multiple layers of fabric and stiffening interfacing that hold their shape when properly supported — but crease badly when crushed from an odd angle. The sleeves are the second problem area. Folded incorrectly, they develop hard crease lines along the sleeve cap that are nearly impossible to shake out without steam or an iron.
Fabric composition plays a role too. Pure cotton creases more readily than a cotton-polyester blend. If you have flexibility in what you pack, a shirt with a small synthetic-fibre percentage will travel better. That’s worth knowing when you’re choosing what to bring on a trip where you’ll be living out of a backpack for several days at a stretch.
What Do You Need Before You Start Packing?
Getting the fold right is easier when you’ve done a small amount of prep work. Having the right materials to hand saves time and protects the shirt during transit.
- A clean, flat surface. A table or hard-topped bed works. Folding on a soft or uneven surface produces uneven folds that crease under load.
- A freshly washed or dry-cleaned shirt. Packing a damp or soiled shirt accelerates creasing and can transfer stains or smells to other items in the bag.
- Packing cubes or a compression folder. Optional, but they lock the fold in position through the full journey — worth the small investment if you travel with dress shirts regularly.
- A garment bag. Worth including if the shirt is linen, silk, or a very fine cotton where even a small crease will be obvious.
- Tissue paper. A single sheet placed between folded layers provides a small buffer on fine fabrics and prevents button impressions from transferring.
Before folding, take thirty seconds to check the shirt itself. Look for loose buttons or stray threads that could snag on other items. Remove any collar stays — the small rigid inserts that keep collar points flat — and store them separately in a zip pocket. Without stays, collar tips curl during transit and are hard to press back into shape at the other end.
How Do You Fold a Dress Shirt Step by Step?
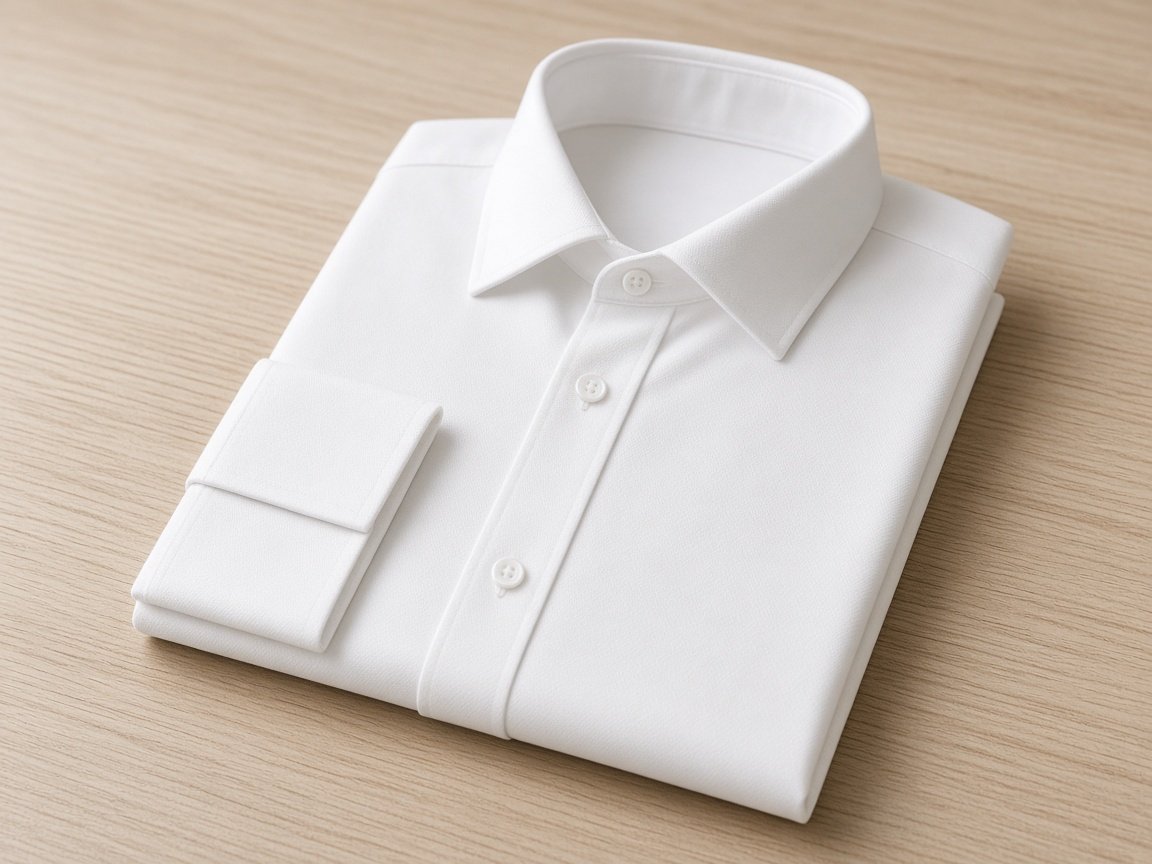
This is the foundational method for packing a dress shirt in a backpack. It takes a couple of minutes the first few times, then becomes fast with practice. The goal is a flat, compact rectangle with clean, straight fold lines — no diagonal creases.
- Lay the shirt face-down on your flat surface, collar at the top, hem at the bottom.
- Button every button — including the collar button. This holds the fabric taut through the fold and stops the front from gaping and creasing.
- Fold one side inward to the centre, bringing the sleeve with it. The fold line runs from the shoulder straight down to the hem.
- Fold that sleeve back outward so it lies flat and parallel to the folded shirt body. It should land clean, not bunched.
- Repeat on the other side — fold the panel in, then fold the sleeve back out flat.
- Fold the bottom third of the shirt up toward the collar.
- Fold in half again, bringing the bottom up once more until collar and hem are roughly aligned.
- Flip the parcel over so the collar side faces up. The fold lines should be straight and clean — no diagonal crease marks.
If you see diagonal crease lines, the shirt wasn’t lying completely flat before you started. Unfold, smooth it out carefully, and begin again. It sounds fussy — but starting with a genuinely flat shirt is the difference between a shirt that arrives wearable and one that doesn’t.
Should You Roll a Dress Shirt Instead of Folding?
Rolling is popular for packing casual shirts and T-shirts because it saves space and avoids sharp fold-line creases. For a dress shirt, though, the results are less reliable. Rolling creates a cylinder of compressed fabric — and as that cylinder shifts inside the bag, pressure builds unevenly, particularly around the collar and the stiffened placket.
That said, rolling can work if you’re careful. Fold the collar flat against the shirt, fold both front panels inward so they slightly overlap, then roll tightly from the hem upward toward the collar. Secure with a rubber band or tuck the roll into a mesh pocket to stop it unravelling. This takes up less vertical space than the flat fold method, which matters in a compact bag.
The honest trade-off: folding produces better wrinkle results for dress shirts in most situations, while rolling is more space-efficient. If you’re heading somewhere with an iron or steamer available on arrival, rolling is a reasonable gamble. If you need to wear the shirt straight from the bag with minimal touch-up, the fold method is the safer choice.
How Do Packing Cubes and Compression Folders Help?
A packing cube is a rectangular zippered case designed to keep clothes organised inside a bag. For a dress shirt, the cube serves as a rigid boundary — it stops the folded shirt from shifting, and it prevents other items from pressing against the fabric at odd angles. Many travellers who regularly carry shirts in backpacks consider packing cubes the single most effective tool for arriving crease-free.
Compression folders take this a step further. They include a rigid folding board that you wrap the shirt around, plus a zip-close sleeve. The board holds the fold in a fixed position and the sleeve compresses the shirt gently and evenly across the full surface. This is as close to garment-bag protection as you can get inside a standard backpack.
If you don’t have either tool, a large zip-seal plastic bag works as a makeshift version. Fold the shirt, place it inside, press out the air, and seal. The bag keeps the fold locked and protects the shirt from moisture. It’s not elegant, but it’s genuinely effective for a quick overnight or weekend trip.
Where in Your Backpack Should the Dress Shirt Go?
Position matters as much as how you fold. The worst place for a dress shirt is the bottom of the main compartment — everything else in the bag sits on top of it, and the cumulative pressure builds over hours of travel. Even a well-folded shirt in a packing cube will crease if it spends a long flight under a laptop and two days’ worth of gear.
The best spot is at the top of the main compartment, sitting on top of heavier items rather than beneath them. If your backpack has a separate top-lid pocket or a secondary front compartment, those are even better — the shirt is fully isolated from the main load. Slide it in flat, collar end first, so it’s the last item in and the first item out when you open the bag.
If you’re packing for a multi-day trip and the shirt must share space with everything else, place it on top of the clothing layer but below any top-access essentials like a water bottle or travel documents. Keeping it sandwiched between soft items — a folded mid-layer, a T-shirt — gives it a buffer from hard-sided objects. For a full system approach to fitting everything in efficiently, the guide to packing a backpack for a 3-day trip at The Backpack Expert walks through how to layer different garment types for minimal creasing and maximum space.
What Type of Backpack Works Best for a Dress Shirt?
Not every backpack is designed with clothing in mind. For a dress shirt specifically, two design features make the most difference: opening style and structural stiffness.
Clamshell opening — a backpack that opens fully flat, like a suitcase — lets you lay the shirt in without bending or threading it through a narrow top opening. This is the single biggest practical advantage for carrying formalwear. Top-loading packs require you to roll or slide the shirt in from above, which increases the chance of disturbing the fold.
Structural stiffness — a back panel or frame sheet that keeps the bag from collapsing — prevents the pack from squashing the shirt against whatever surface it’s placed on. A completely floppy unstructured bag can fold nearly flat on impact, putting a sudden crease through the shirt regardless of how carefully it was packed.
Volume plays a role too. A bag that’s too small forces the shirt into a compressed position it can’t hold. Something in the 25–35L range gives enough room to pack a shirt flat without sacrificing space for the rest of your gear. If you regularly carry a shirt alongside work and travel essentials, the best backpacks for travel and work reviewed at The Backpack Expert specifically look at bags that handle both clothing and a laptop in a single organised system — a useful reference when choosing your next bag.
How Do You Keep the Collar From Getting Crushed?
The collar is the hardest part of a dress shirt to protect and the most visible sign of a badly packed one. These techniques help keep it intact from bag to boardroom:
- Keep the collar button done up. An open collar spreads and flops during transit, creating creases at the collar stand that are hard to press out.
- Use collar stays. Even lightweight plastic stays provide enough structure to hold the collar points flat through both the fold and the journey.
- Pack rolled socks inside the collar opening. A pair of rolled socks props the collar open and holds its curved shape — the same technique used by shirt packagers in retail. The socks go in the bag anyway, so this costs no extra space.
- Place the shirt collar end outward. With the collar facing the outer wall of the backpack rather than the inner contents, it’s less likely to be pressed against hard items.
If you’re carrying the shirt as a carry-on for a flight, your choice of bag matters as much as your packing technique. The guide to the best carry-on backpacks for international travel at The Backpack Expert covers several models designed with flat-pack clothing in mind — worth reading if you need a bag that fits in the overhead bin and still treats your clothes well.
What Should You Do When You Arrive to Remove Any Wrinkles?
Even a well-packed shirt can arrive with light creasing after a long journey. These are the fastest fixes that don’t require a traditional iron:
- Hang it in a steamy bathroom. Run a hot shower, hang the shirt on a hanger away from direct water spray, and close the door for ten to fifteen minutes. The steam relaxes the fibres and most creases drop out on their own.
- Use a travel steamer. Compact travel steamers are widely available and effective on most shirt fabrics. They work faster than the shower method and give more precise control over creased areas like the collar and cuffs.
- Use a wrinkle-release spray. These sprays relax fabric fibres with a light misting followed by a gentle tug and smooth-out. They’re particularly effective on cotton and cotton-blend shirts.
- Hang it overnight. If you have time the evening before you need to wear it, hanging the shirt on a hanger lets gravity do much of the work, particularly on medium-weight cotton.
If the accommodation has an iron, use it. A quick press with a medium-heat iron through a damp cloth takes two minutes and produces a result none of the above can fully match for a formal shirt that needs to look really sharp.
What Are the Most Common Mistakes to Avoid?
These are the errors that most often turn a carefully folded shirt into a creased one by the time the bag is opened:
- Packing the shirt at the bottom of the bag. The weight of everything else creates sustained, uneven pressure. The shirt always goes near the top.
- Folding without buttoning first. An unbuttoned shirt shifts during the fold, creating misaligned panels that crease under load.
- Packing a damp shirt. Even slight dampness from a humid environment or a rushed tumble dry sets creases deeply into cotton fibres. The shirt should be fully dry before it goes in the bag.
- Overpacking the bag. When the main compartment zip is a struggle to close, the shirt will arrive creased regardless of how well it was folded. It needs room to hold its shape.
- Using an unstructured bag that collapses when set down. Bags with no frame or stiffening panel can fold nearly flat on impact, creating a sharp crease through whatever is inside.
If you’re carrying fragile or pressure-sensitive items alongside your dress shirt — a camera, for instance — the same principles around padding and compartmentalisation apply across the board. The step-by-step guide to packing a camera in a backpack at The Backpack Expert covers how to position and pad sensitive items so they don’t press against clothing or each other during transit.
Frequently Asked Questions
Can I pack multiple dress shirts in a backpack?
Yes, but each shirt needs its own fold. Stack them one on top of the other with a sheet of tissue paper between each shirt to prevent button impressions from transferring. Place the whole stack flat inside a packing cube at the top of the main compartment. Two shirts packed this way sit comfortably in a 25–30L bag without crowding the rest of the contents.
What’s the best shirt fabric for travelling in a backpack?
Cotton-polyester blends and synthetic performance fabrics labelled as “wrinkle-resistant” or “easy-care” travel noticeably better than pure cotton. They resist creasing under compression and spring back faster when unfolded. If you need a pure cotton shirt for a formal occasion, budget time for steaming or ironing on arrival — no packing method fully protects pure cotton in a bag over a long journey.
Is a garment bag worth carrying inside a backpack?
For everyday travel with a standard cotton dress shirt, a packing cube or compression folder usually provides sufficient protection. A garment bag is worth the extra bulk if you’re carrying a linen, silk, or very fine cotton shirt where any crease will be highly visible. Some travel backpacks include a dedicated garment sleeve that acts as a built-in garment bag — a useful feature if you pack formalwear regularly.
How do I pack a dress shirt in a small backpack or day pack?
In a small bag, rolling is usually the only option that physically fits. Fold the collar flat, fold the front panels inward so they slightly overlap, then roll tightly from the hem upward toward the collar. Place the roll horizontally along the widest point of the bag and pad it on each side with soft items — a folded T-shirt works well — to cushion it from hard objects and prevent unravelling. Some light creasing is likely; plan to steam or hang the shirt on arrival.
Can packing cubes damage a dress shirt?
Standard packing cubes don’t damage shirts — they protect them. The risk comes from overfilling the cube so it compresses the shirt unevenly, or from forcing a large shirt into a cube that’s too small. Use a cube sized to hold the folded shirt with a small amount of room to spare. If you have to force the zip, the shirt will arrive creased from the compression.
Should I iron the shirt before packing it?
It’s worth pressing the collar and cuffs before packing — these areas are hard to steam effectively on arrival and are the most visible part of the shirt when worn. A full press of the entire shirt before packing is less critical: a well-folded shirt in a compression folder will arrive in similar condition whether it was pre-ironed or not. The fold and placement matter more than the starting condition for most shirt fabrics.
Final Thoughts: Sharp on Arrival, Every Time
Packing a dress shirt in a backpack is entirely manageable once you have a consistent method. The fold itself takes around two minutes when you know the steps. The placement — top of the pack, collar end outward, padded on both sides by soft items — adds another thirty seconds. Add a packing cube or compression folder and you’ve removed most of the variables that cause creasing in transit.
The bigger-picture point is that the right bag makes this significantly easier. A clamshell-opening travel backpack with a structured frame eliminates most of the challenges that make carrying formalwear feel complicated. If your current pack is making it harder than it should be, it may be time to look at bags designed for both clothing and travel. The best travel backpacks reviewed at The Backpack Expert include several that handle dress clothes, laptops, and daily gear in a single organised system — a useful reference if you’re in the market for an upgrade.
Apply the steps above on your next trip. They work equally well for a one-night business trip and a two-week journey. The shirt in your bag doesn’t have to look like it was slept on.